Form Installation Feature
During the BETA version period,
Standard Plan can use all of this functionality.
The restrictions during the BETA version are as follows. Restrictions are subject to change without notice.
: No limitation
: 30 days
What is the Form Installation Feature?
The form installation feature allows you to set up an input form that collects information such as an email address, administrative number, subject, inquiry details, and quiz results when a visitor reaches the quiz results page.
Judge can perform various statistical analyses using Google Analytics, but Google Analytics cannot collect quiz results or perform various analyses on an individual visitor basis. On the other hand, using the feature, it is possible to collect quiz results and perform various types of analysis for each person who fills out the form.
The three main features are as follows.
You can choose how to display the form
-
You can easily configure the display method, such as whether the form is displayed as a component of the quiz results, or whether the quiz results are displayed after the form is submitted.
Receiving History at a Glance
- Form receipt history can be tracked in a list format for easy management, and exported in CSV format.
Well-Rounded Analysis Panel
-
The sequential path of the choices made by the form filler can be seen automatically colored on the flowchart.
In addition, the time spent for each question can be easily viewed as a bar graph.
Flow of Form Installation
Follow the steps below to set up your form.
A compatible plan is required to set up the form.
1. Select a Form Display Mode at Endpoints
-
When you move to the screen, create a quiz, and move to the endpoint, you will see the panel as shown in the figure below.
Choose your preferred display method from the select box in the panel.
The meaning of each item is as follows
: No form is displayed at the endpoint.
: The form is displayed as one part along with each text and image at the endpoint.
: Display only the form at the end first, and after the visitor has answered the form, display each piece of information at the endpoint.
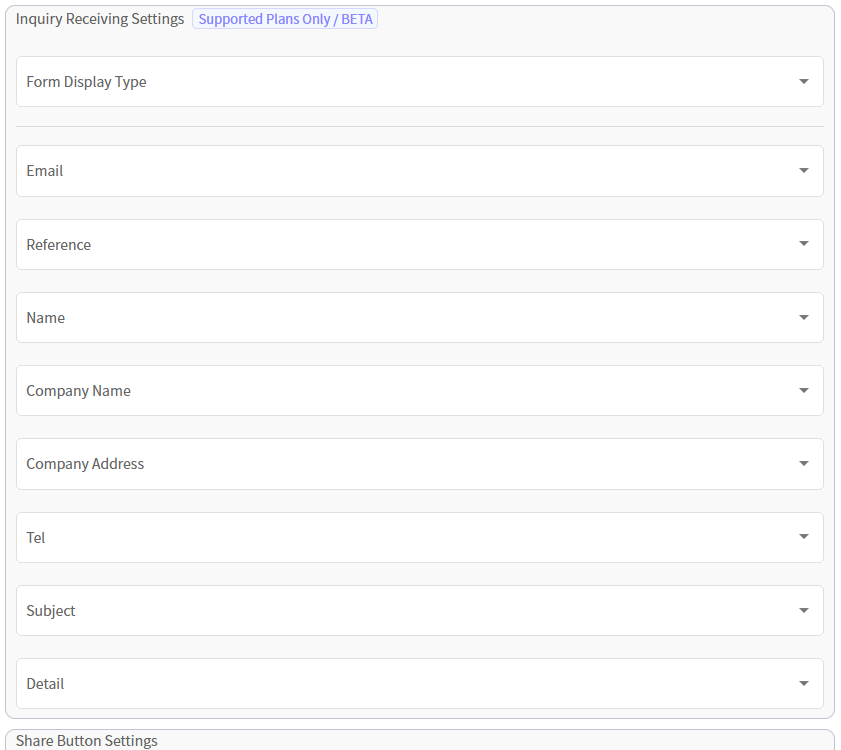
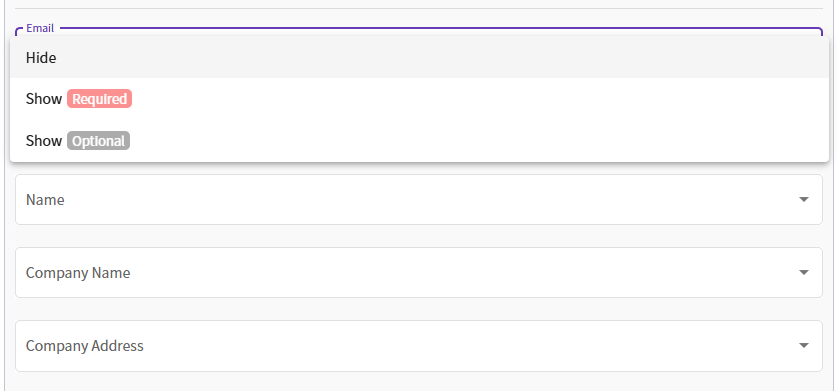
2. Select Items to be Displayed in the Form
-
Select the items you wish to display. You can set whether each item is required or optional.
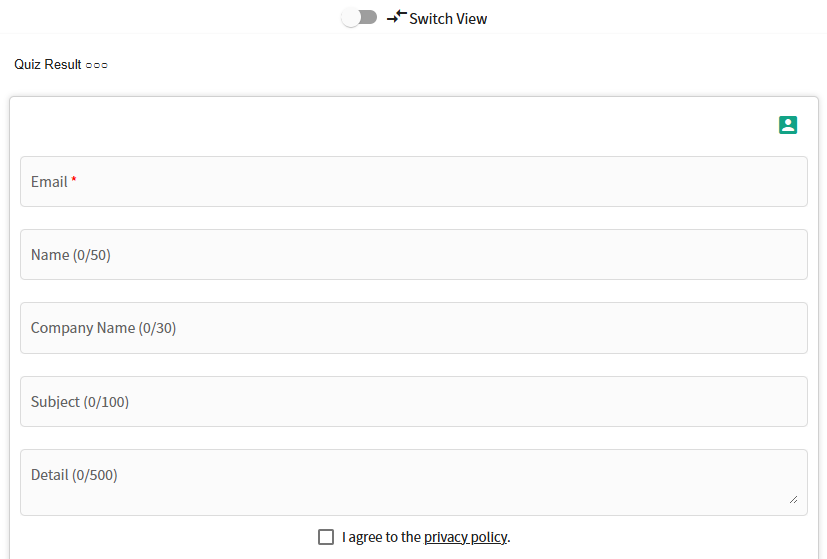
3. Check Operation on the Editor
-
Use the button to switch to display mode and see how the form works.
The submission process is not executed on the editor when the or buttons are clicked. This can be confirmed by actually applying the design template.
The
Privacy Policywill be linked to the one registered within the screen.If there are no problems, save the file and run it until it is reflected in the production data to obtain the public URL and embed code.
The above steps make it easy to implement the installation of forms.
Retrieving User-Submitted Forms
The following operations can be used to retrieve the contents of a form filled out by a visitor.
Move to Inbox
-
When you move from My Page to the screen, the results of form receipts are listed in order of date and time, starting with the most recent.

-
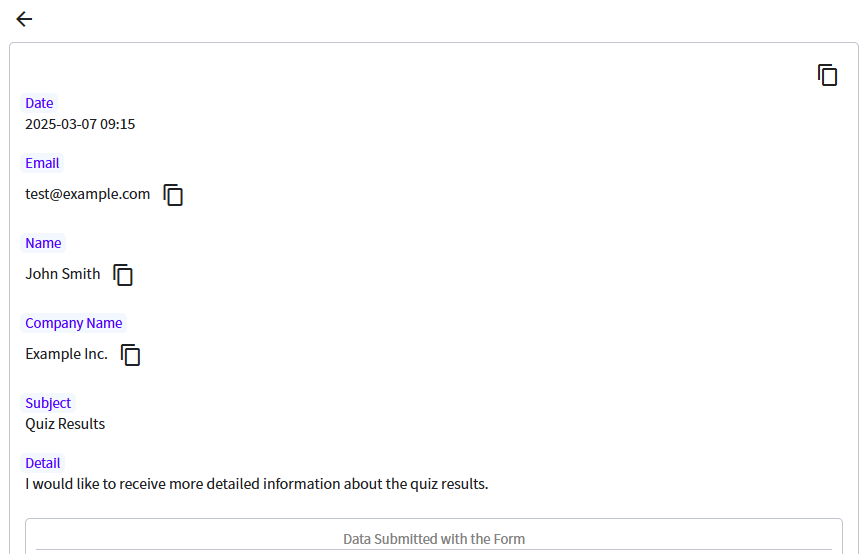
Click on each listing to see the information entered in the form, as shown below.
Various detailed data on quiz results upon receipt of the form will also be displayed in conjunction with the form. Radar charts and bar graphs are also displayed if there are settings for scores by aggregate category.
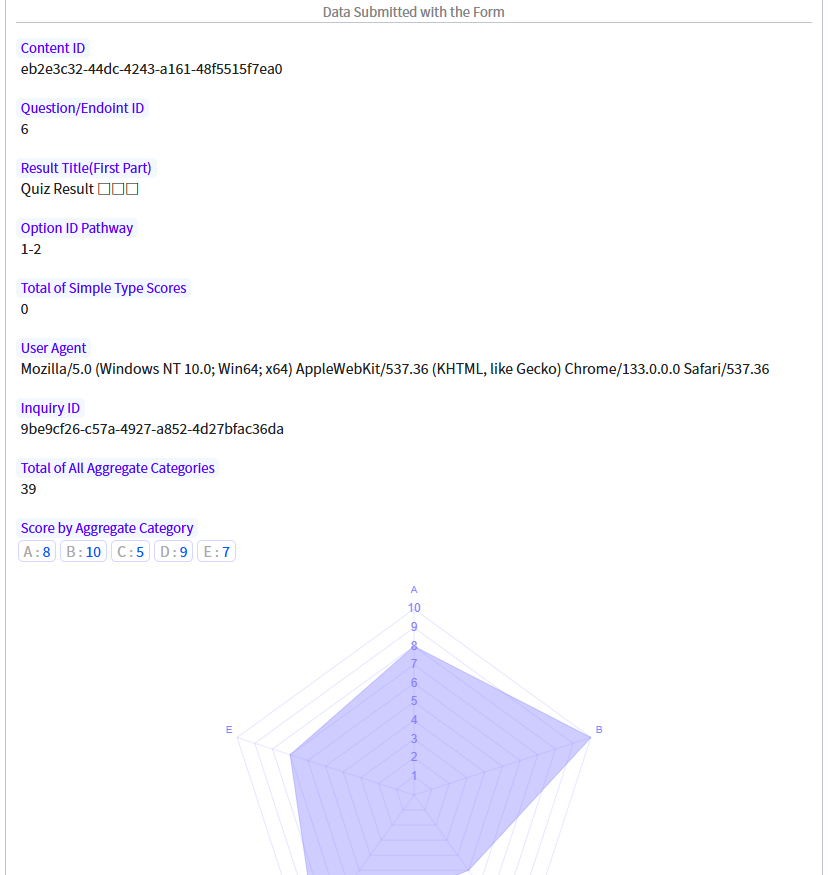
The meaning of each item in the panel is as follows.
ID of the target quiz.
: The ID of the question/endpoint when the form is submitted. This is important information about which quiz result the visitor reached.
: Part of the question/endpoint text content of the form submission. This is important information about which quiz result the visitor reached.
: A string of choice IDs indicating the order in which the visitor chose the choices and arrived at the quiz results.
: Final sum of simple scores.
: Information about the visitor's operating system and browser.
: ID for each inquiry.
: The final aggregated category score is the sum of all scores regardless of category.
: The final aggregated category scores as finally tabulated in the quiz results.
: Calculation results for each formula displayed in the quiz results.
Receive Notification Upon Form Submission
You can receive a notification to your registered email address upon receipt of a new form by doing the following.
If there is an inquiry receipt, you will be notified of the number of receipts every ten or so minutes.
Register Your E-mail Address for Notification
-
Moves to the screen, press the button.
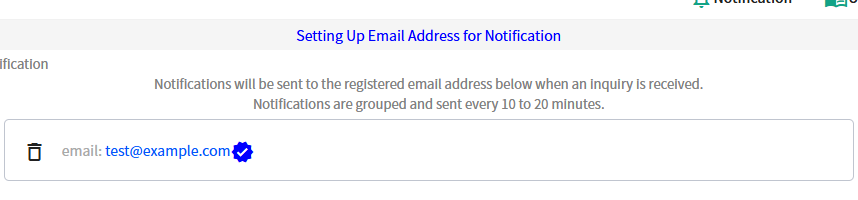
When you move to the screen, the following screen will appear. Register your email address to receive notifications. After pressing the button, Judge will send you a confirmation email.
-
Enter the confirmation code in the email sent by Judge and your email address will be confirmed as follows.
Check to see if the confirmation email from Judge has been sorted into your spam folder.
Analyze the Quiz Response Status of Form Respondents
The following operations allow you to check various information associated with the forms entered by visitors in flowcharts and bar graphs.
The analysis panel is only available for plans that support it.
Show the Analysis Panel on the Form Detail Screen
-
View detailed information from the list on the screen and press the button, you can track the status of visitors' quiz responses in a flowchart format.
Flowchart
-
The questions and options selected by the visitor can be illustrated with automatic color-coded highlighting on the flowchart, as shown in the figure below.
The example below shows that visitors responded to
ID:0|first question>ID:3|question B>ID:4|quiz result: Your type is "□□□"...This indicates that the respondents answered the questions in the following order.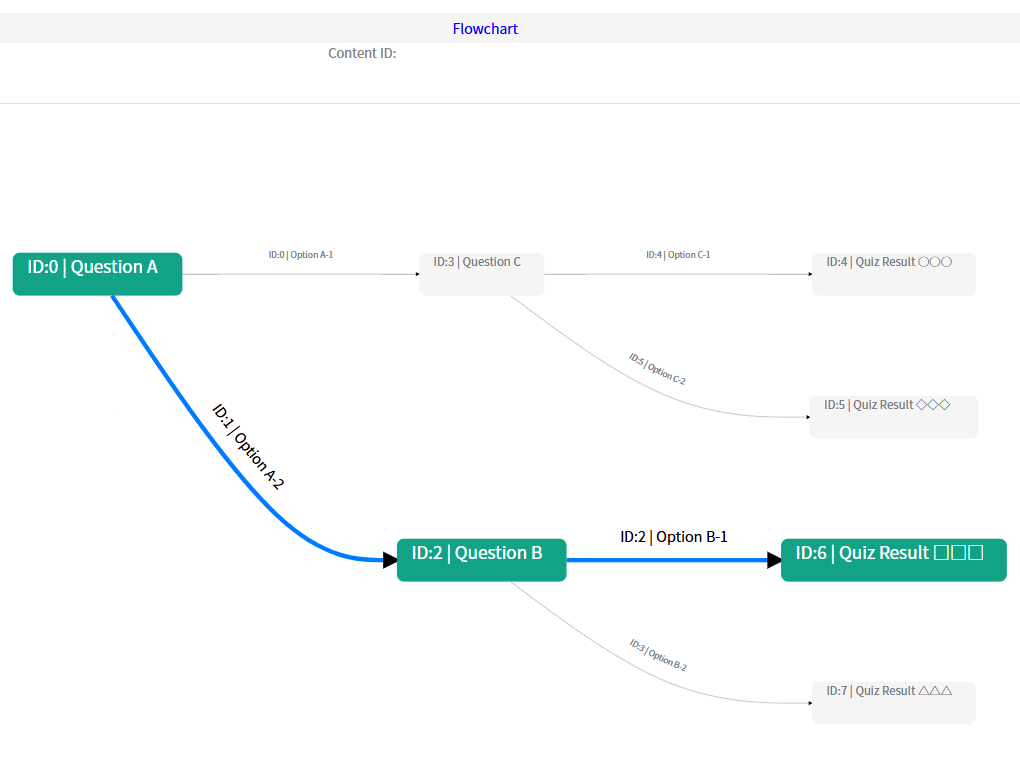
Click on each question or choice on the flowchart to view the full text of the question or choice, as shown in the figure below.
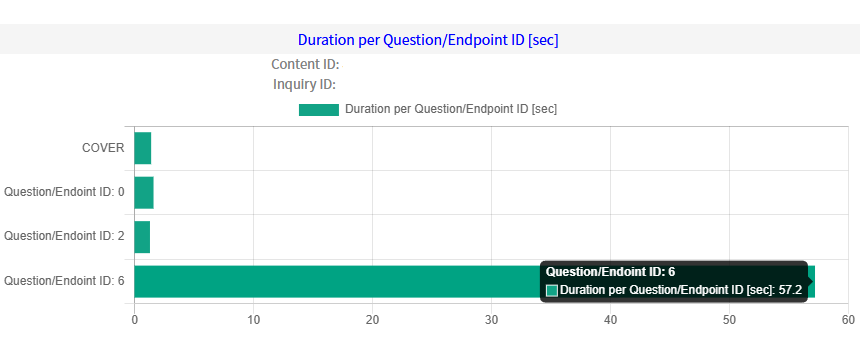
Duration for Each Question/Endpoint
-
As shown in the figure below, a bar graph easily shows the time spent by visitors for each question/endpoint.
In the example below, the visitor took several seconds to press the start button on the first cover screen, and the next
Question/Endpoint ID: 0andQuestion/Endpoint ID: 3took about the same number of seconds to answer the questions. Then, it took about 111 seconds from the time the quiz result,Question/Endpoint ID: 4, was displayed until the form was submitted.