Creating Quizzes
Quiz Creation Process
This section details how to create questions and options, as well as useful functions to support creation, how to set total scores, radar chart displays, and share buttons.
Create New
- Move to >
-
Press the button. Transit to the screen. You can choose between
question-branchingtype andquestion-fixedtype as the question structure types for quizzes that can be created.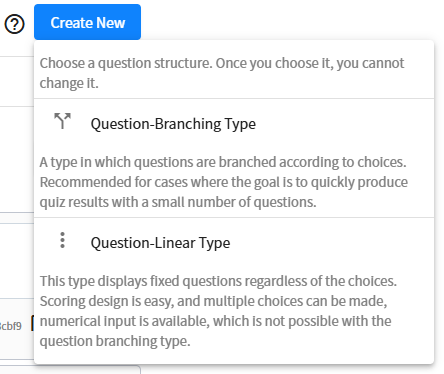
-
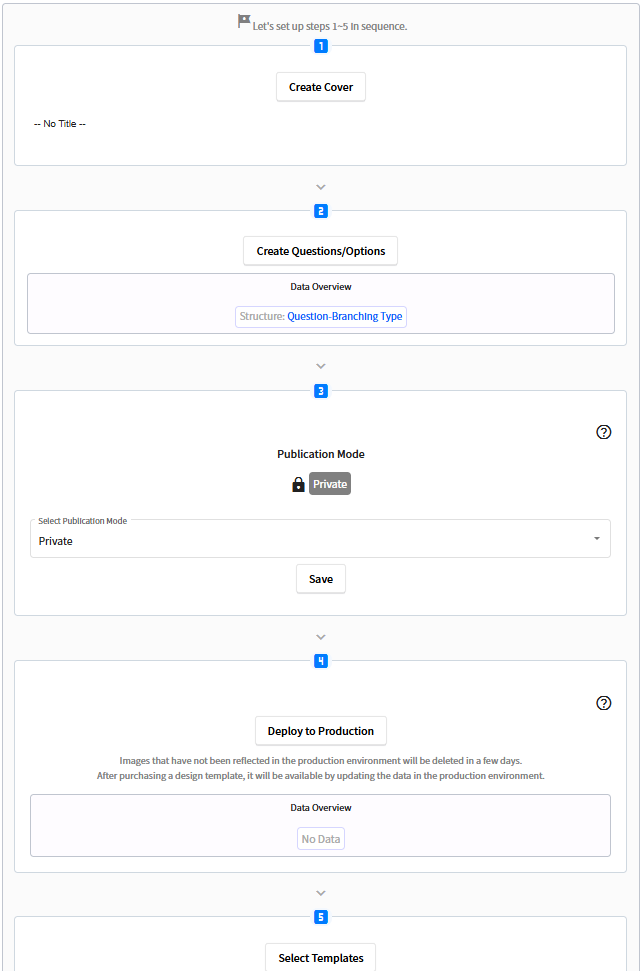
Create quizzes in the order listed in steps 1 to 5 on the screen.
1. Create a Cover Window
-
Enter a summary of your quiz and save it. You can set the title, details, and image.
The content entered here will be displayed modally as the cover page when you first access the quiz.upload image size: Maximum height and width is 500px, square or portrait ratio is recommended.
2. Create Questions and Options
-
When you move to the screen, a panel like the one below will be displayed.
Go back and forth between multiple panels of panel, panel, and to create questions, options, etc.
Once saving is complete, return to the screen again.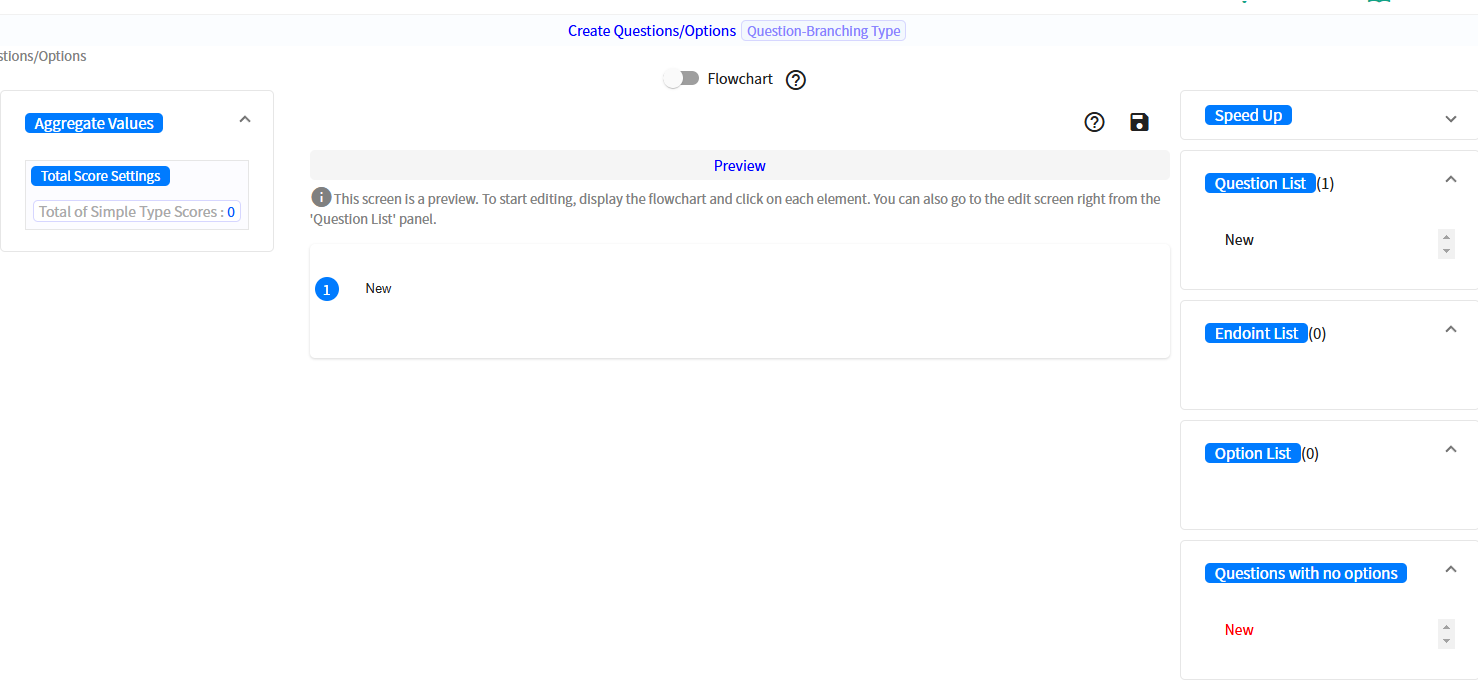
Quiz Logic
-
Judge's basic method is to connect questions and results after the options.
More details are explained here.
Explanation of Terms
- Questions
These are questions that will lead you to the products you want to introduce. Multiple options can be registered for a question, and one related image can be registered. - Options
These are the options for the question. You can register new questions following each option. The key is that each option connects to the next question. - Endpoints
This is the final content you reach after answering the quiz.
You can register explanations of quiz results and links to products. -
Quizzes
These are user-generated quizzes.
A single set of user-created questions, images, options, endpoints, etc.
Preview Panel
-
The panel is a panel for checking operation that displays the edited questions, options, and endings in a quiz format.
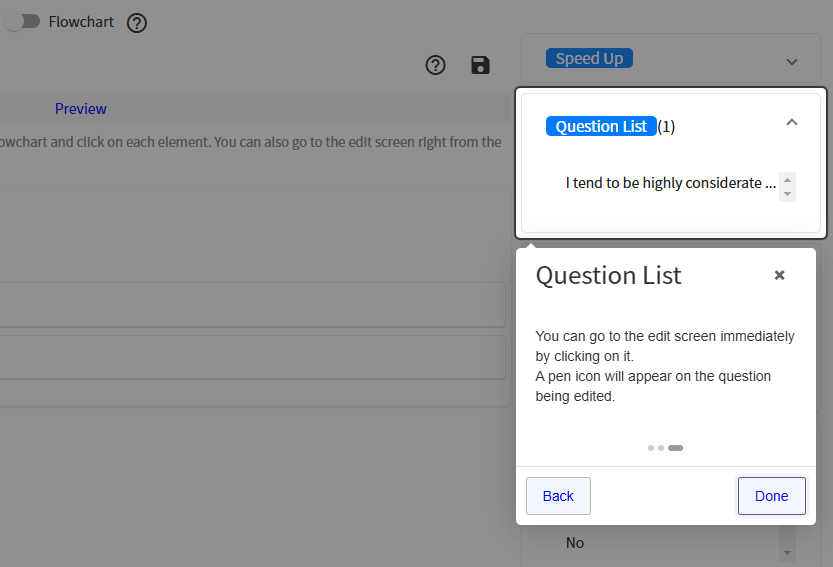
This is just a simple preview for efficient editing, so you need to apply each design template to check the actual operation. From each menu as shown in the image below on this panel, you will move to the editing panel for flowcharts, questions, options, etc.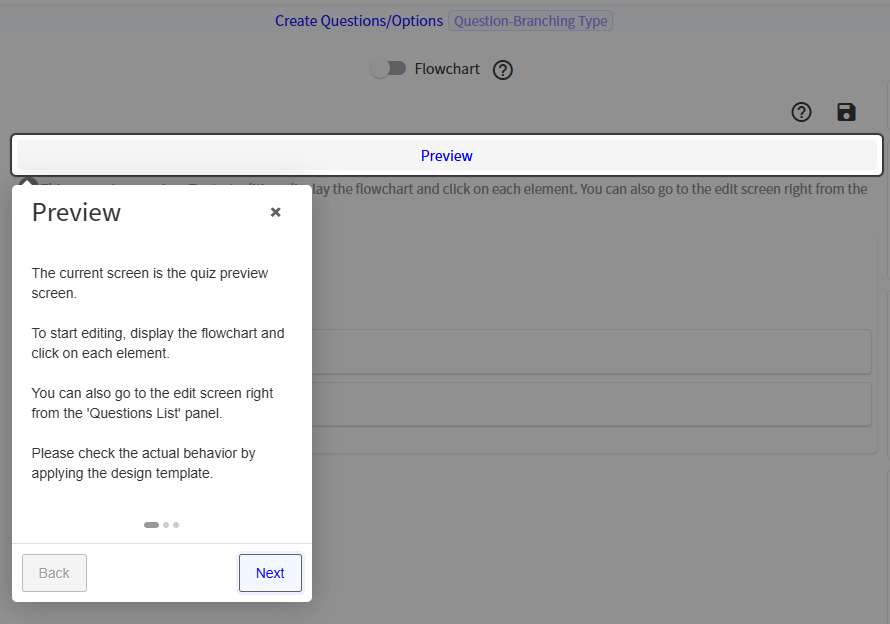
Flowchart Panel
-
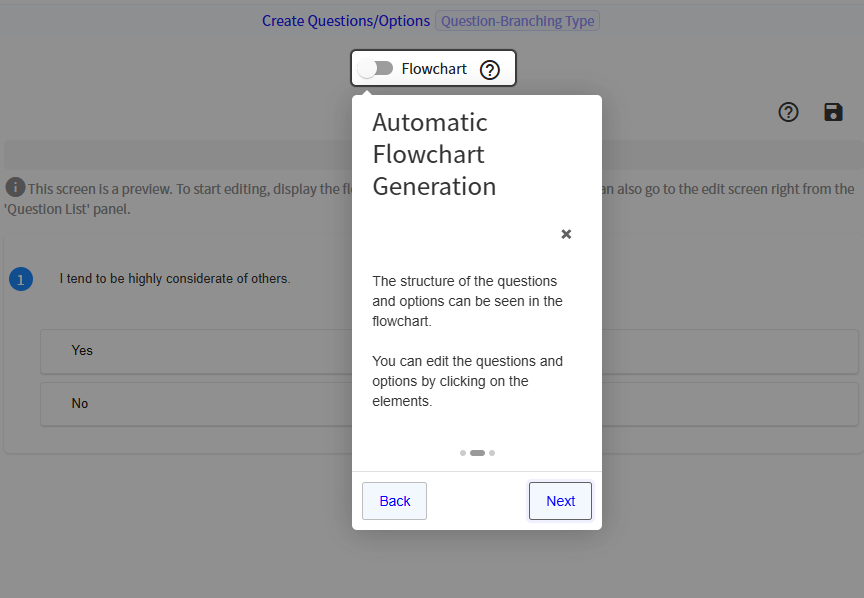
By turning on the toggle at the top of the screen, you can check the structure of the questions and options you have created in a diagram.
You can perform various settings for the entire flowchart from the buttons.
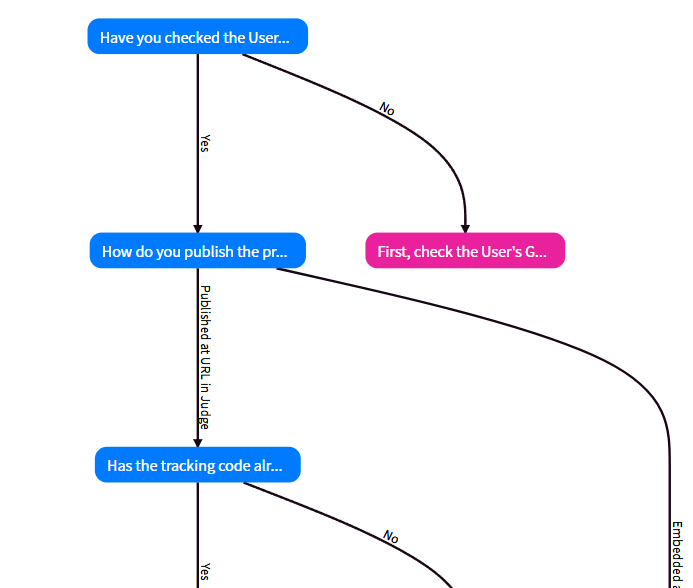
Font size, font color, flowchart orientation, presence or absence of question images, connector type, control of information displayed in options, various padding, etc. can be adjusted with a high degree of freedom.
Find your favorite flowchart settings.Clicking on an individual question or option on the flowchart will display a POP menu where you can move to the editing screen for each question, adjust the font size, etc.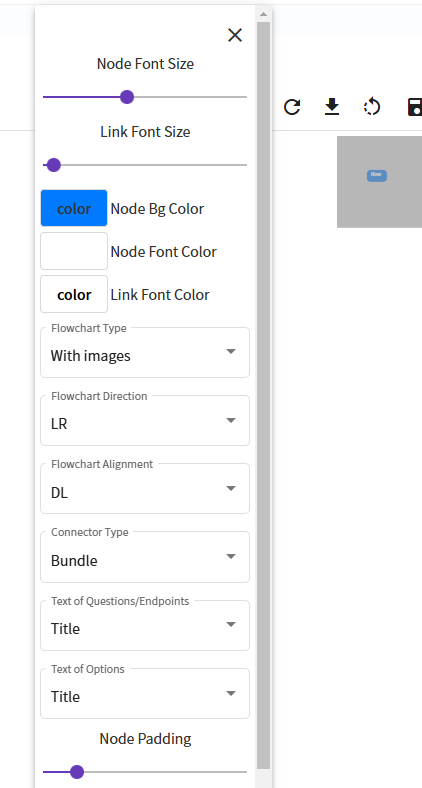
You can save the flowchart settings by clicking the button.
Edit a Question and Options Panel
-
The panel is for editing the questions, options, and endpoints.
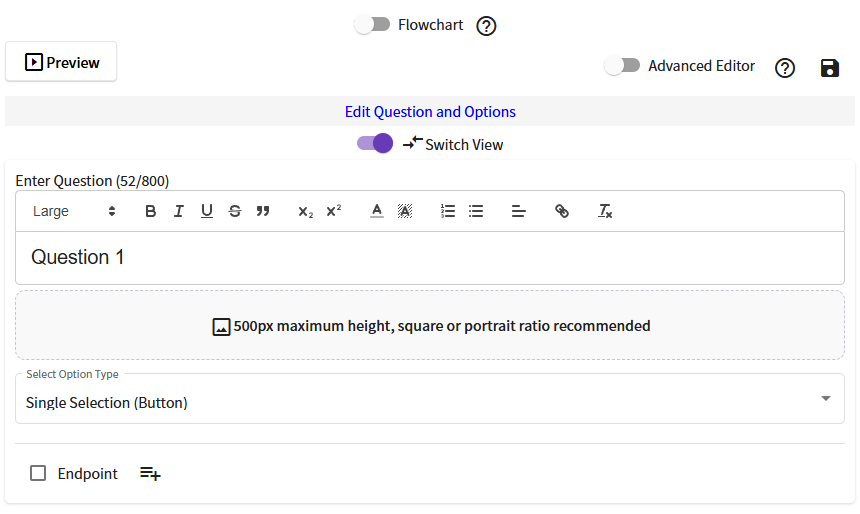
Follow these steps to create your questions and options.
-
Enter your question.
You can configure settings such as font size, font color, and character alignment. When using the 1 screen 1 question slider template, align the text in the center, and when using the vertical stepper template, align it to the left. It will look nice when you apply the design template. - Add a new option with the button.
- Let's enter the options. As with the question, you can configure settings such as font size, font color, and character alignment.
-
Specify the type of option.
If the question structure is aquestion-fixedquiz, you can specify the type of the option from the select box, such as allowing multiple choices or entering numerical values.If the question structure is of the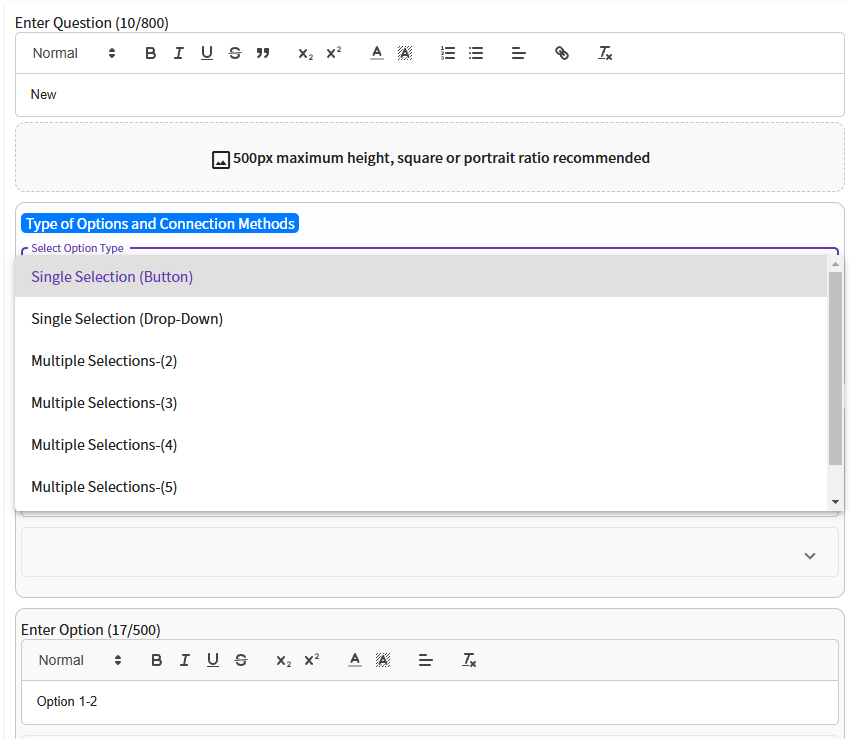
question-branchtype, it is limited to single-choice only, but it is possible to change the appearance of the options, such as radio buttons or select boxes. -
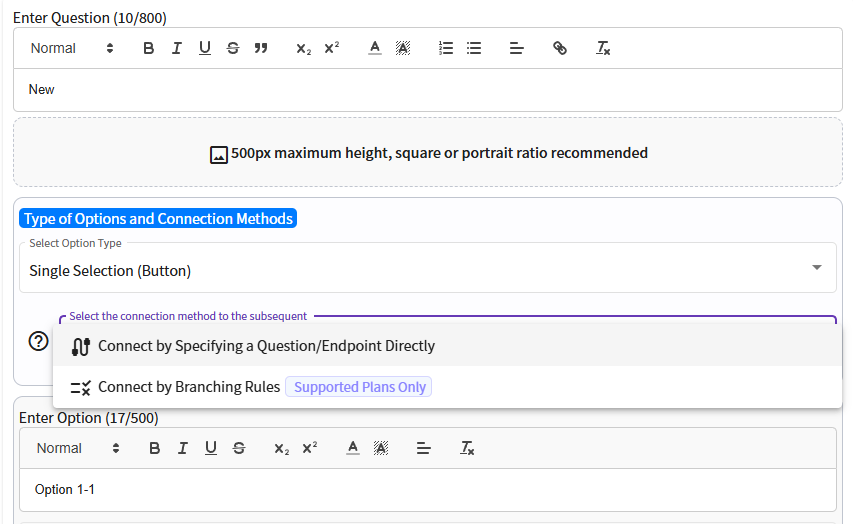
Select the connection method from the select box for the next question/endpoints following the current choice. For each connection method, create a new subsequent question/endpoint or specify an existing question/endpoint to connect.
For more information on connection methods, please click here.
- Repeat steps 1~5, going back and forth to the flowchart panel, etc., to create questions and options in sequence.
- Check the [ Endpoint] if you want to enter the quiz results without any questions following the options.
- The question switches to quiz result input mode. Describe the quiz results.
- Finish editing and press the Save button.
3. Select a Publication Mode
-
You will be redirected to the screen. From the list, select the publication mode of the quiz you created for your purposes. Normally, you would select .
Details are explained here.
4. Deploy to Production
- Moves to the screen. By clicking the button, upload the edited data to date to the production environment for finalization. Image files that are not reflected in the production environment will be deleted in a few days. Remember to reflect them in the production environment. After purchasing a template, you must update the production data to be able to use it. If you try to use the template after purchase without updating the production data, an error message stating that you are not authorized to use the template will be displayed.
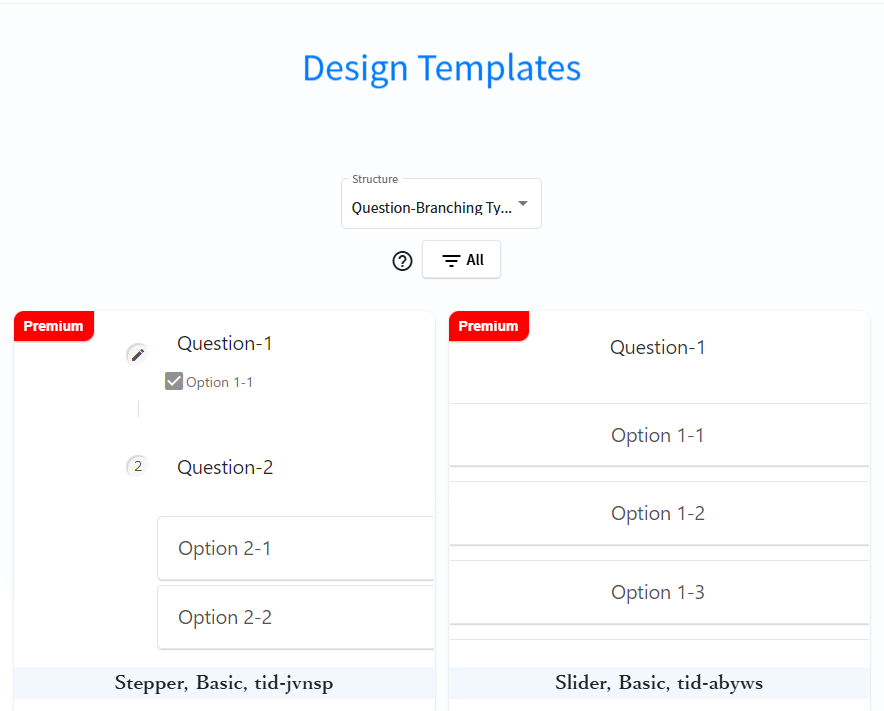
5. Select a Template
-
Go to the screen to find a template that matches the image of the quiz you have created.
What you can do on this screen
-
You can temporarily apply the design template to a quiz created from the button and check its operation as a test mode. The display has an expiration date and various functions such as forms and analytics are not available. -
Click on the button to get the public URL and embed code for the quiz you created.
The button will appear when you click the button from My Page and the template is free or has already been purchased. If you want to publish on this site, you can get the public URL from the button.
If you want to embed the quiz on your own website, use the button to obtain the embed code. -
Judge offer a wide variety of templates that can be used for free or purchased. Purchased templates can be used without expiration.
Various data that can be set
When creating a quiz, various data can be set. Data related to scoring and branching will be explained on the next and subsequent pages.
Endpoint Common Page
-
The endpoint common page setting allows you to connect any document that can be shared at the endpoint.
This option is useful when you want to display the same document at multiple endpoints, saving you the trouble of creating duplicate documents.
You can create a new common endpoint page with the button. The select box displays a list of common endpoint pages that have already been created, so select the desired document and connect it.
The contents of the select box can be updated to the latest state with the button.
Note that common end pages must be saved separately. Clicking the button at the top of the screen does not save the updates to the common end page itself.
upload image size: Maximum height and width is 500px, square or portrait ratio is recommended.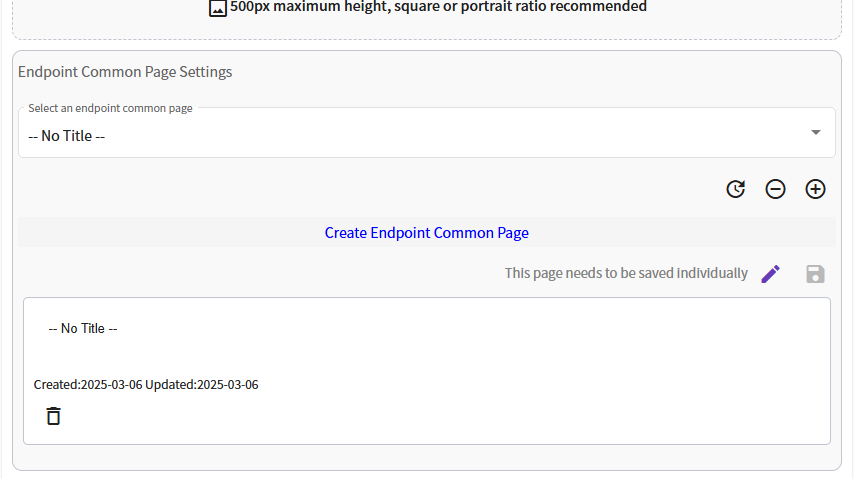
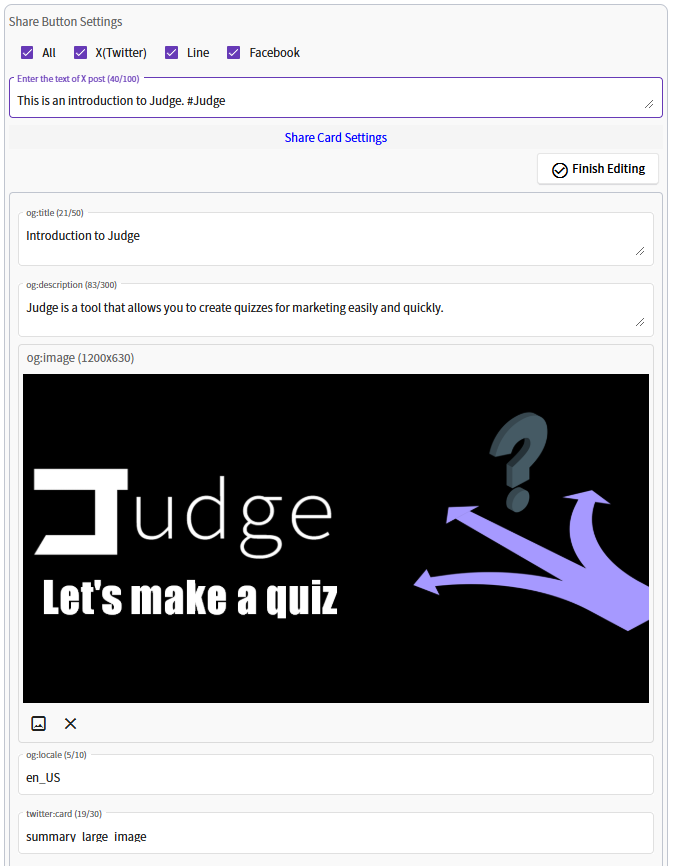
Social Media Share Settings for Quiz Results
-
First, turn on the toggle at the top of the screen to display the settings.
This option allows users to set up cards for displaying quiz results on each Social Media. It is compatible with X (Twitter), Line, and Facebook.
When a card is clicked on in each Social Media, the user will be redirected to the initial screen of the quiz. Since the card does not take the user to the quiz results page, it is recommended that the card have a clear and concise text or image regarding the quiz results. Please refer to OGP Settings for details on each setting item.
Example of card display when sharing X (Twitter) (see figure below). When verifying the display of the card, make sure that the quiz's publish option is set to
Publish [Normal]. Other publish options will not allow outside services to access the quiz.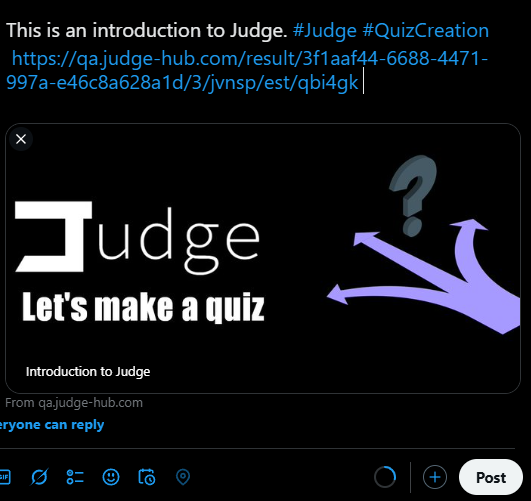
YouTube Video Insertion
-
First, turn on the toggle at the top of the screen to display the settings.
This option allows you to insert a YouTube video into the question or endpoint.
If you have a video for each quiz result, or a video for each question and ask the questions in the video, you can provide a more unique user experience.
You can directly specify the video URL in
https://www.youtube.com/watch?v=xxxxxformat. Copy the target video URL and paste it in Judge.
External Link Settings for Quiz Results
-
This option allows you to insert any external link into the quiz results. It will look different depending on the design template used, but will basically appear as a large dedicated link button.
Click events can be obtained by implementing Google Analytics linkage settings. For more information about Google Analytics can be found here.

The correspondence of each item is as follows.
: Link button display name
: Link button URL